This tutorial will help you get setup with your OBi Phone and customise it to your preference. It is recommended for people of intermediate technical capability and above.
This configuration tutorial is not supported via Obihai support - please post any questions you may have within this thread. This tutorial will be updated as needed to reflect changes in the firmware or on the OBiTALK portal.
This tutorial requires a "fresh" IP Phone - if your phone is already configured you will need to factory reset it and delete it from the OBiTALK portal.This tutorial uses a hybrid configuration approach - that is some elements will be configured via the local UI and others via the OBiTALK portal.
1. Firmware update and factory resetDial *** then 6 to check if a firmware update is available. If a firmware update is available press 1 to download it and hang up. The firmware file will then download (a downloading icon will show on the top status bar) and the phone will update and restart.
After the phone has restarted, select the "Settings" app and press the "Factory Reset" soft key. This ensures we are dealing with a 100% fresh device.
Note, on phones with the language set to English-UK, the "Settings" app is called the "Configuration" app. Please ensure you have also deleted the device from OBiTALK - click on the device name in the OBi Dashboard and look for the blue
Delete Device button.
2. Initial configuration via XML (If required)By default, the OBi Phone ships pre-configured for North America. To implement country-specific tone sounds, ringing profiles and digitmaps, we can upload an xml profile to the OBi. The xml profiles attached below this post also allow dialling of numbers using the + sign then country code - for example +44 20 7890 1234. It also adds the ob prefix consistently across OBiTALK calls, so when you redial an OBiTALK number from the call history it will direct itself rather than you having to direct it via the OBiTALK call key.
Note: Your service provider needs to support dialling in the international (+xxxxx) format for this to work.
- If you are in North America and want to be able to dial numbers in the + format plus support ob prefixing, download the NA digit extension file below.
- If you are outside North America, you will need to apply the appropriate localisation file for your country. Localisation files for Australia, New Zealand and the United Kingdom are attached to this post. (Ireland, France, Netherlands, Germany and Norway to follow next).
Extract the xml file from the attached zip file and save it on your computer.
Now we need to update the phone with the saved XML file. Find your phone's local IP address by going to the Settings/Configuration app. The first item listed is network and it will show the current IP. Enter this IP address into your web browser and enter the default username and password -
admin - for both.
Navigate to
System Management -> Device Update then under
Restore Configuration click
Choose File and choose your saved xml file, then
Restore to apply the localisation profile.
Your OBi will now restart and the profile will be applied.
3. Add your device to OBiTALKIf you haven't already done so, create an OBiTALK account at
www.obitalk.com. Login to your account and select "Add Device" from the left hand menu.
If you do not have/use Google Voice or wish to setup another voice service first, make sure you uncheck the "I want to configure Google Voice on this device" optionClick add device and dial the star code presented in the portal. Your device should now add itself to the OBiTALK portal.
Note, if the portal didn't respond to the star code when you dialled it the first time, then try it again. This may happen if congestion between your location and the OBiTALK servers causes the request to time out.4. Add Your Voice ServiceYour device is now in the OBiTALK portal:
- If you left "I want to configure Google Voice on this device" selected then you will be prompted to add your GV account to the OBi
- If you unselected this option you will see the Service Provider options page
If you are at the Service Provider options page, you can setup SIP voice services - either add a brand new account or an existing account.
If you wish to add a new account select one of the Approved Service providers and follow the instructions to get setup. If you have previously subscribed to an approved service provider via OBiTALK, then click on the SP you use and re-add the account to your OBi. This is more relevant for North American users.
If you have an existing SIP account you want to put onto the OBi, scroll down the screen to "OBiTALK Compatible Service Providers" and click next. On the next page you can either select your service provider (if they are listed) and enter your account credentials, or click "Generic Service Provider" and enter your SIP credentials and service providers SIP server settings.
Now you have added a voice service to the device it will restart and the service will appear beside the first line key on the screen.
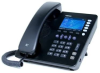
5. Pair your Bluetooth Cell Phone and Synchronise ContactsOptional on the OBi1032 with an OBiBT dongle installed, standard on OBi1062Open the Settings/Configuration app and select "Bluetooth".
Scroll down to "Discoverable" and select this
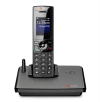
On your Cell Phone/Mobile/Handy/Keitai Denwa/GSM/Móvil go to your Bluetooth settings, find your OBi and pair with it. Your OBi will appear as "OBiPhone xxx" where "xxx" are the last 3 digits of your device's OBi number (printed on the back sticker)
On the Bluetooth Setup screen on your OBi you will now see under the status item that it will be connected to your cell phone.
Now go to the contacts app and press the "More" soft key and use the joystick key to highlight "Import" and press the check/tick button. You will now see the "Importing Contacts" dialog. At this point, your cell phone might pop up a notification asking for access permissions - accept these permissions.
If your phonebook import continually fails, please log a support ticket including your cell phone type, software version and language settings.Your contacts will have now imported or if your numbers contain the + symbol you will see an alert and some soft key options to either ignore or add the entries. Add all the entries as we have already uploaded the xml to allow dialling with the + symbol at step 1.
Go to your contacts app and check the numbers are all displaying and you can make a test call to one of your contacts.
6. Add call keys for OBiTALK, Bluetooth and other servicesWe are
not going to use the Wizard in the OBiTALK portal for setting up the call keys in this tutorial. At this point you need to make a decision on how you want to manage the call keys:
- If you do not wish to create a call key to allow your OBi to make and receive calls via your cell phone's Bluetooth then use OBiExpert
- If you want to allow your OBi to make and receive calls via your cell phone's Bluetooth then use the Local UI
- If you use the Local UI do not use OBiExpert to change Line Key settings as it will overwrite the Local UI settings.
Note, the reason for using the Local UI to add a Bluetooth call key is that you can't currently assign this via OBiExpert. This will be added shortly and I will update this tutorial when it is fixed.To enter OBiExpert, follow my instructions at the end of this post:
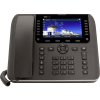
http://www.obitalk.com/forum/index.php?topic=458.20Now, from either OBiExpert or the Local UI, Navigate to IP Phone -> Line Keys and assign your line keys. Line keys are broken into tabs, so as the OBi1032 has 3 keys and 4 tabs there are 12 configurable keys. You will need to assign a key to "Next Tab" so you can move between the tabs and access the keys you setup.
Some notes on Call Appearance Keys:
- A call appearance key can support a single call, so if you wish to have more than one call at a time on your voice service you'll need to add extra call keys to hold the calls. This will change in an upcoming software release to support 4 calls per key
- You can setup an "Unbound" call key to handle calls from any service - just don't select an SP service from the drop down
7. Setup Programmable Keys and Assign Next Tab KeyEnter OBiExpert and navigate to IP Phone -> Programmable Keys. You can now configure all the programmable keys as you like. I recommend you make the first programmable key "Next Tab" and assign the rest to other functions you require, like do not disturb, speed dials and so on.
You can create a printed insert for your labels by clicking on your device in the device dashboard and going to the Programable Key Wizard. Label the keys as you like but
Don't Press Save! Press "Generate Labels" (without saving) and then print your insert that way. If you hit save you will overwrite your settings.
8. You're ready to goYour OBi Phone is now ready to use to your liking. From here you can start to customise the device further, for example find a nice wallpaper that you like and add it to the phone. There are great wallpapers at
http://wallpaperswide.com - make sure you download in 480x272 resolution. The User Guide explains how to copy wallpapers onto the OBi.
Notes:
- You can now manage your device via the portal, however if you make changes to things that have been configured via the xml file or on the local UI then the portal will always overwrite the setting.
- If you are adding multiple IP Phones to the same OBiTALK account and want to be able to dial between them without hitting the auto attendant, you will need to go into OBiExpert on each device and change Voice Services -> OBiTALK Service, inbound call route to ph or {(<:ob>xxxxxxxxx):ph},ph to add "ob" to the start of inbound OBiTALK numbers
Optional steps for anyone with a Google accountEven if you don't live in the US, you can still integrate a few of your Google account's features on your OBi phone. And if you are already a Google Voice user, there are a couple of extra features you can switch on.
If you live outside the US you can setup Google Voice in your Google account for outbound calling and assign a call key to make an outbound call via the OBi.
All Google users can also enable the "Buddy List" app on the OBi's home screen. The Buddy List reflects the presence status of people who are in your Google Chat list. Buddy List can be enabled within OBiExpert: At
Voice Services -> SPx Service* under
Network Provided Services enable "Buddy List". When the device restarts the Buddy List app will show on the home screen below the other apps - use the down arrow to scroll to it.
*SPx Service is the SP service you added Google Voice toYou can also assign a presence monitor key to monitor an individual on your buddy list. To do this select the "Key" function as "Presence Monitor", the "Service" function as the "SPx service" GV is setup on and in the "number" field enter the email address of the Buddy you wish to monitor.
You now have the Buddy List app enabled and can assign a dedicated key to monitor an individual's presence.
Note - UK Profile updated 9 October 2014Note - UK Profile updated 17 November 2014