The auto attendant is designed to be used to allow you to make calls from your Obi when away from it. However, although ObiHai did not intend for it to be used as a literal auto attendant, there is a work around to use it for your business, family, etc. as a fully functioning auto attendant (Press 2 for Jim, Press 3 for John, etc.). Despite the fact that you can use it as such, I can't guarantee that it will work 100% of the time. The following caveats exist:
1. The phone will shut off and restart after the caller hangs up if they enter an invalid number, disabling the auto attendant for around 45 seconds and sending calls to voicemail during that time.
2. Extensions need to have 2 as a prefix and # as a suffix (20#, 23#, 24# and so on).
3. This is a relatively technical process and involves using ObiExpert. If something goes wrong in the future you might not be able to fix it immediately. Although my guide is mostly idiot proof, having your IT person handle this process will most likely make it a breeze.
4. The auto attendant can only handle two callers at once. If a third caller dials the number the auto attendant is set up on, you will hear a busy signal.
On the plus side, it is free and can be used with Google Voice. Your options for dialing are relatively big. Since you need to use the pound sign (#) when using an extension, you can allow for a near unlimited amount of extensions (starting with 20#, skipping 21 and 22, and beginning again at 23# and going beyond 29999#). Options for dialing minus adding extensions are pre-set and can not be changed. Dialing 1 will forward your call to the phone number associated with the Obi Device you set auto attendant up with. This is useful if your business has an operator phone. Setting up Auto attendant on the operator/reception phone will allow callers to dial 1 to be directed straight to that phone. Dialing two allows for the extensions as mentioned above. The message you record will play three times and then, if there is no action from the caller, the auto attendant will act as if the caller dialed 1 and transfer to the Operator phone (Or phone you set up auto attendant with).
The following is my tutorial for setting up auto attendant to work:
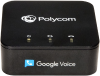
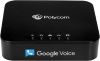
1. Make sure your Obi Device is turned on, connected to the internet and connected to the Service Provider. Make sure you have ObiTalk and SP1 (in my case Google Voice) working properly. Check for a dial tone and check to see if you can call other Obi devices using their nine digit Obi number (600-XXX-XXX).
2. Log into ObiTalk. Click on the phone you want to use for auto attendant. Scroll down and click on "Obi Expert Configuration". Click on "Enter Obi Expert".
3. On the left hand side click on "Voice Services" and then "SP1 Service". Navigate to "X_InboundCallRoute" and uncheck "OBiTALK Settings" and "Device Default". You will have to uncheck these two things for most settings we edit in the future so make sure to do so. Remove "ph" from the Value bar and input "aa". Scroll down and hit Submit.
4. On the left hand side click on "Auto Attendant" and check Enable (Remember to uncheck ObiTalk Settings and Device Default). Choose the drop down menu for "PrimaryLine". If you are only using the Auto Attendant for Obi devices, choose "ObiTALK Service". If you want to use US, Canada or International numbers, choose "SP1 Service".
5. Under "Auto Attendant 1 Prompts" below, input "&pause()" into the value boxes of Welcome, MenuTitle, PleaseWait, and EnterNumber. In the Menu value box, enter "%User1%". Hit submit at the bottom.
6. "%User1%" is the voice recording. Unless you have changed the auto attendant with ObiExpert in the past, this file will likely not exist. To create it, dial *** on your Obi Device. Hit zero and when asked for a value, dial 1001#. Dial 1 and then hit 5. Right after you hit 5 the phone will start recording. Wait two seconds before speaking and then record. Your recording must be less than 135 seconds. When you are finished wait two seconds before hitting the pound key (#) to end the recording. Press 1 to save the recording. Wait a few seconds for it to save and then hang up. If you don't know what you want the recording to say yet (especially in regards to what extensions you will have), skip this step and come back later. You can record this at any time after Step 5. An example recording might sound like:
"You have reached [Company]. For general calls or to speak with the operator, dial 1. For Matt, dial 20#. For Dave, dial 23#, For Mark, dial 24#. For Susan, dial 25#."
7. You will have to modify the digit map to only accept "1" and your extensions beginning with "2". Staying on the auto attendant page, navigate to "DigitMap". Copy the entire value of the DigitMap box and paste it into a word processing document (Notepad/Textedit is the best for looking at plain text). Pay attention as this part is complicated.
You should see the following:
(([1-9]x?*(Mpli)|[1-9]|[1-9][0-9]|<00:$1>|0|**1(Msp1)|**2(Msp2)|**3(Msp3)|**4(Msp4)|**8(Mbt)|**9(Mpp)|(Mpli))
You will need to add to the ending right before the last parenthese. For each extension, you will need to use the formula "<0:600XXXXXX>". The 0 should be replaced by a number. For example, if I put in 5 the real extension will be 27# (Since all extensions begin with 2, have the middle number two higher than inputted (excluding 0 which translates to 20#), and end with a pound sign (#)). There is a colon and to the right of it is an Obi or phone number. In Step 4, if you chose "ObiTALK Service", the number needs to be a nine digit Obi number (Ex: 600-555-8920). If you chose "SP1 Service", the number can be any number accepted by your service provider. Add a vertical bar between each "<X:600XXXXXX>". Since my business has five employees with Obi1062's, I set up my line of code as the following:
(([1-9]x?*(Mpli)|[1-9]|[1-9][0-9]|<00:$1>|0|**1(Msp1)|**2(Msp2)|**3(Msp3)|**4(Msp4)|**8(Mbt)|**9(Mpp)|(Mpli)|<0:600XXXXXX>)|<1:600XXXXXX>|<2:600XXXXXX>|<3:600XXXXXX>|<4:600XXXXXX>)
Those are Obi numbers, with the X's obviously being replaced with real numbers. Notice that 1-4 are actually translated to 3-6, while 0 remains 0. The extensions for my auto attendant are respectively 20#, 23#, 24#, 25#, 26# with this setup. As a result, when I linked me devices I set the extensions to 20, 23-36 for consistency. Employees both send a receive calls from the same extension in this case. Remember to have a parenthese at the beginning and end to close the entire line of code. You can theoretically have many extensions as long as your line of code remains clean. When you are done adding extensions, copy and paste it back into the DigitMap value box under Auto Attendant. Hit submit at the bottom.
8. If you haven't already, go ahead and record the auto attendant prompt from Step 6 using the steps provided.
OPTIONAL: If you want to link the devices up with the same extension for dialing within your Obi network (phones listed under "My Dashboard"), go to link devices and set the extension to whatever you set up with the auto attendant. You Obi Phones will now be able to call each other using the two digit extension and receive incoming calls from that extension you set up. You can theoretically set up one Google Voice number to multiple Obi Phones and link them up by extension, allowing them to make Obi-to-Obi calls to one another by dialing the extension of another linked phone. All calls from them will dial out with the caller ID of that one phone number. Using this with the auto attendant is a good way to get around the limitations of Google Voice without purchasing expensive service provider plans from Vonage, BroadVoice, etc.
You should be all set at this point. Remember to keep the Obi phone you are using powered on and connected to the service provider and ObiTALK network at all times in order to keep Auto Attendant working. Best of luck and PM me or post below if you have any questions or problems.