Edit 09/05/2015: Since doing these steps, I have actually come across the XML config file that MarkObihai has done. The original post I was working from is from 2013, and Mark's is Nov 2014, so I have decided to scrap what I have done below, and use the XML provided by Mark.
MarkObihai XML File Post:
https://www.obitalk.com/forum/index.php?topic=8434.0I'll keep the below info in case it helps someone who wants to play around with Expert Mode.
---------------------------------------------------------
02/05/2015
My situationCountry: UK
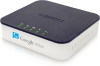
Device: OBitalk 110 bought from Amazon
Using the OBi Web portal rather than local device setup. If you wish to use local device setup rather than the cloud based solution. Search the forum for the other guide, as this is for the cloud route. I prefer this route personally, so I can update the config from wherever I am.
Original PostHeavily based on the following forum post by "ukuser" who should receive full credit. I just copy/pasted with a few edits on where to find each section. Their instructions have basically just been adjusted to allow configuration from the new Obi Expert Portal, rather than the local unit.
Original:
http://www.obitalk.com/forum/index.php?topic=5866.0Another post worth reading:
http://www.obitalk.com/forum/index.php?topic=8434.0A - Register with OBiTalk (free)1) Go to
www.obitalk.com on any computer
2) Register an account
B - Add Obitalk device1) Add Device
3) Scroll down and either tick or untick "I want to configure Google Voice on this device" (I unticked, as I figured im in the UK, I wont get free calls through Google Voice anyway).
4) Follow the instructions on the next page shown on the site (Should be something like "Please pick up the telephone handset, and dial XXXX"). I picked up the handset, heard silence for a second or two, then a dial tone. If you don't hear anything make sure you haven't mixed up the Phone and Line plugs (As I had done by accident. Also check you have the right kind of RJ11 to UK plug adapters. I got the ones with Ringer cabling).
5) Once you hear the dial tone, dial the code the website gives, and you should hear a prompt saying "The code dialled has been passed to the server, or something like that."
6) Once you hear this prompt, hang up.
7) The website page should now automatically update and show you your device details. Check the MAC and serial numbers match the info shown on the bottom of your device.
8 ) Press continue (cant remember exactly the button name here)
C – Configuration of the OBitalk device by going to Obi Expert1) Click on the link to the OBi Dashboard
2) Your device should be listed on that page. If not, post on the forum for help.
3) Hover over the device name, at this point, it should still be called "Obi110"
4) A config page should be shown.
5) Set the "Webpage Admin Password" to something secure.
6) Set the "OBi Attendant PIN" to something secure.
7) Check the other settings look correct, mine were fine out of the box.
8 ) Click "Save". The top of the page should then say "Configuration has been updated successfully."
9) Click on the "OBi Expert Configuration" button at the bottom of the page. When the popup shows, click "OK" to confirm you want to enter the expert mode.
10) Click on the "Enter OBi Expert" button.
D - ObiExpert Config - Network Setting1) On the left menu, click on "System Management" > "Network Setting"
2) Under "Time Service Settings" you'll need to change a few things. Notice that you cannot change the fields yet.
3) For "NTPServer1" untick "ObiTALK Settings"
4) Now you'll notice "Device Default" gets ticked. Untick "Device Default".
5) Now the field should be editable. Enter "uk.pool.ntp.org"
6) For NTPServer2, do the same tick clicking procedure as in step D5, but enter "europe.pool.ntp.org"
7) For "LocalTimeZone" do Untick Untick process as above, and set to "(GMT +00:00 (London, Lisbon)".
8 ) For "DaylightSavingTimeEnable" do Untick Untick process as above, and tick actual setting to enable daylight saving.
9) Scroll to the bottom of the page and click on "Submit" button.
10) Page should then show "Successfully saved OBi Expert config to OBiTALK."
E - ObiExpert Config - Auto Provisioning1) No changes needed.
Other guides may tell you to edit these settings, but as we are actually using the ObiTalk Portal settings in the cloud, we want to keep Auto Provisioning ON. The reason for disabling it, is so that any changes you make locally to the device, don't get overridden by the Portal settings. However, we ARE using the portal, so these should always override local settings.
F - ObiExpert Config - Physical Interfaces > PHONE Port1) Whilst still on the ObiExpert pages, in the left menu, click on "Physical Interfaces" > "PHONE".
2) *To get up and running the two parameters above can be left at default. They should be changed eventually - see
http://www.obitalk.com/forum/index.php?topic=5362.msg34764#msg347643) Having said the above, for now, follow the next step to change the references to "911" to "999|112".
4) Do the untick untick process on OBITalk Settings and Device Defaults again for "DigitMap".
5) In the text box, scroll along, and change any reference for 911 to 999|112.
6) Do the same as above step for "OutboundCallRoute"
7) For the next few steps (7.1-7.4), do the untick untick process on each field, and set the value as stated in the step.
7.1) Port Settings > Impedance: 370+(620||310nF)
7.2) Port Settings > CallerIDMethod: FSK(V.23)
7.3) Port Settings > CallerIDTrigger: After Polarity Reversal
7.4) Timers > HookFlashTimeMin: 150 (might be OK at default, depending on phone)
8 ) Scroll to the bottom of the page and click on "Submit" button.
9) Page should then show "Successfully saved OBi Expert config to OBiTALK."
- ObiExpert Config - Physical Interfaces > LINE Port1) Whilst still on the ObiExpert pages, in the left menu, click on "Physical Interfaces" > "LINE".
2) For the next few steps (7.1-7.4), do the untick untick process on each field, and set the value as stated in the step.
2.1) LINE Port > RingDelay: 0
Default RingDelay (4000) works but some telcos like to impose a 20 sec timeout after which their voicemail operates. The delay you enter here cuts into that 20 secs meaning you only have 16 secs to answer. If you alter the InboundCallRoute to use fancy CallerId filtering it might be necessary to increase this time but I haven't got proof of this. My uneducated guess suggestion is try it with 0, and if you get any issues or don't see caller ID, then look to change this or the CallerId filtering.
2.2) LINE Port > RingProfile: B
2.3) Port Settings > ACImpedance: 370+(620||310nF)
2.4) Port Settings > OnHookSpeed 3ms (ETSI)
2.5) Port Settings > CallerIDDetectMethod FSK(V.23)
3) Scroll to the bottom of the page and click on "Submit" button.
4) Page should then show "Successfully saved OBi Expert config to OBiTALK."
5) All Done.
As the original author of these instructions said, That's it, there are no other changes to any other pages required for UK PSTN lines. There may be other things necessary if your phone is not so accommodating as the Panasonic phone he was using.
Next Steps1) Test it all!
2) Next, you might wish to set up the VOIP Provider(s) that you want to use with the unit, but that can be covered by another post on the forum.
Good luck :-)